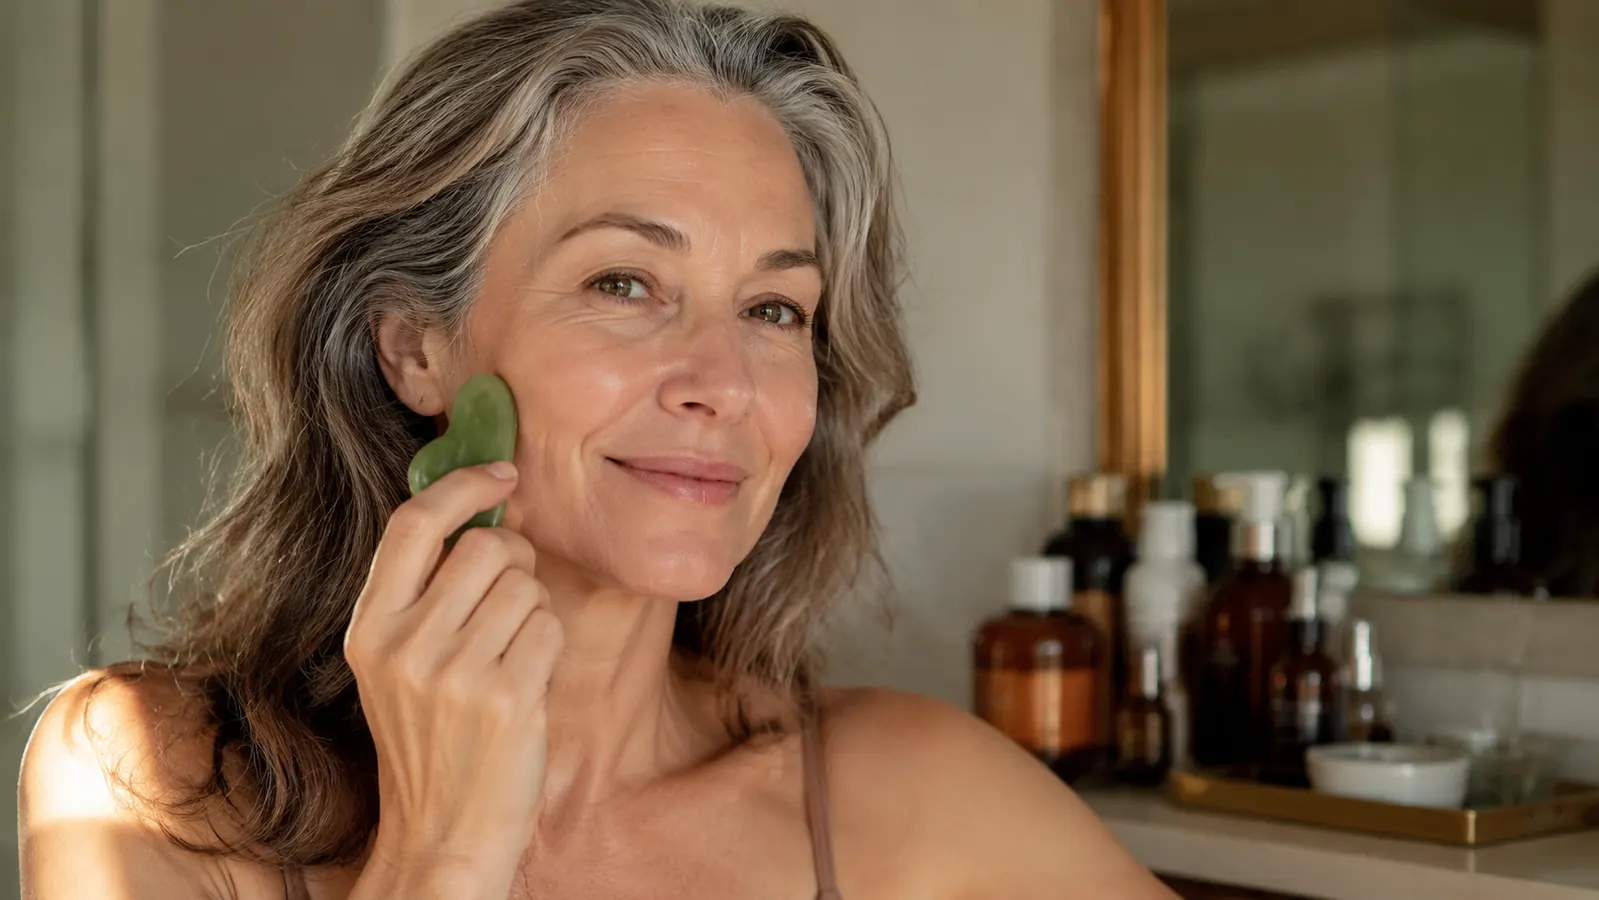
I kept seeing gua sha all over my social media feed for months before I finally picked one up. I am 58, and my face carries it: the soft jowl that started pulling down about three years ago, the puffiness under my eyes every single morning, the general flatness across my cheekbones that was not there at 45. I was not expecting a flat green stone to do much about any of that. But I had read enough about lymphatic drainage and facial fascia to think there might be something real under all the influencer content. So I bought the ROSELYNBOUTIQUE Gua Sha and Jade Roller set, and I figured out the technique properly. What I learned is this: the stone itself is almost irrelevant. Technique is everything. Do it wrong and you are just dragging a rock across your face. Do it right and you get genuine results.
This guide is what I wish I had found before I started. I will walk you through every step, including the prep you cannot skip, the correct angles for mature skin specifically, and the two mistakes I made in my first two weeks that slowed my results. This is not a five-second overview. It is a real how-to from someone who tested it daily for two months on skin that is genuinely aging.
Your face is puffy every morning and the usual creams are not cutting it. This $7 kit is where most women over 50 start.
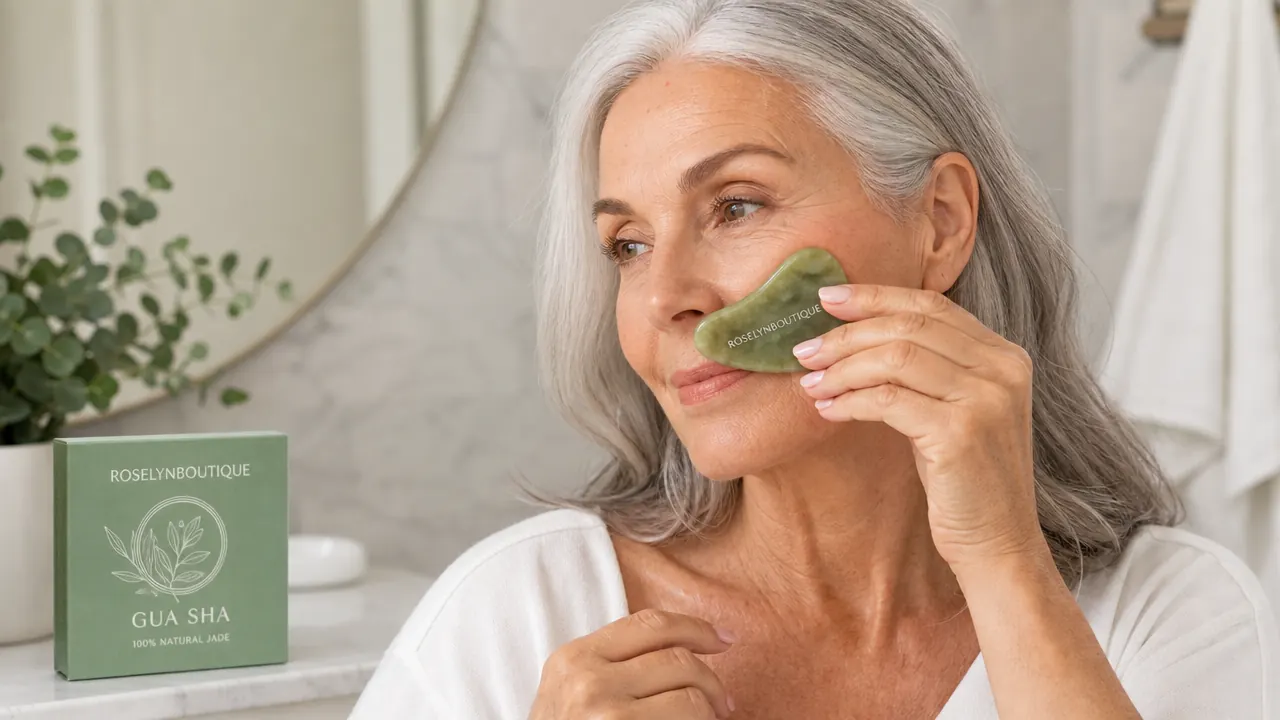
The ROSELYNBOUTIQUE Gua Sha and Jade Roller set has nearly 39,000 Amazon reviews. It includes both tools you need to follow this guide from day one.
Amazon Check Today's Price on Amazon →What Gua Sha Actually Does (and What It Cannot Do)
Before we get into steps, I want to set honest expectations. Gua sha is not a facelift. It will not dissolve fat, fill lines with collagen, or change your bone structure. What it does do is move fluid. The face retains lymphatic fluid overnight, and that pooled fluid is a big part of morning puffiness and the soft, undefined look that creeps in after 50. Gua sha, done correctly, pushes that fluid toward your lymph nodes so the drainage pathways can clear it. When the fluid is out of the way, your natural bone structure shows better. Cheekbones look more defined. The jawline looks sharper. Under-eye swelling drops. None of that is permanent without consistent practice, which is why frequency matters more than any single session.
There is also a circulation piece. The firm strokes increase blood flow to the surface, which brings oxygen to the skin and creates a subtle glow that moisturizer alone does not produce. Over weeks, some women report that their skincare absorbs better because the circulation improvement means the skin barrier is more active. I cannot promise that will happen for you, but I noticed it myself around week three.
Step 1: Set Up Your Skin With Oil or Serum First
Never use a gua sha tool on dry skin. I made this mistake in my first session and woke up with two small red marks on my cheek that took four days to fade. The stone needs slip. You are applying real pressure, and without a lubricating layer between the stone and your skin, you will irritate capillaries, especially on mature skin that has thinned over the decades.
Apply a face oil or a thick serum before you pick up the tool. I use a few drops of rosehip oil, but any facial oil works: jojoba, squalane, argan. If you prefer a serum, use one that stays slightly tacky rather than absorbing instantly. You want your skin to feel slick, not damp. Press the serum or oil into your skin with your palms first, then let it settle for thirty seconds before starting.
One thing I do differently now than when I started: I also oil the gua sha stone itself. A small drop on the flat working surface of the stone. This gives you even more glide and makes the strokes feel smooth rather than grippy.
Step 2: Clear the Neck First
This step surprises people, but it is the one that makes the facial strokes actually work. Your lymph nodes sit along your neck, behind your ears, and under your jaw. If you start moving fluid from your face without first opening those drainage pathways, you are pushing water into a clogged pipe. Nothing goes anywhere.
Hold the gua sha stone flat against the side of your neck, just below your ear. Use the long curved edge. Apply light pressure and stroke downward toward your collarbone. Do this five times on each side, slowly. You are not scraping hard. You are nudging fluid down toward the collarbone where the main lymph drainage trunk runs. Take your time here. Rushing the neck step is the most common mistake I see described in the gua sha forums I participate in.
Clear the neck before you touch the face. If the drainage pathways are closed, you are just pushing fluid in circles.
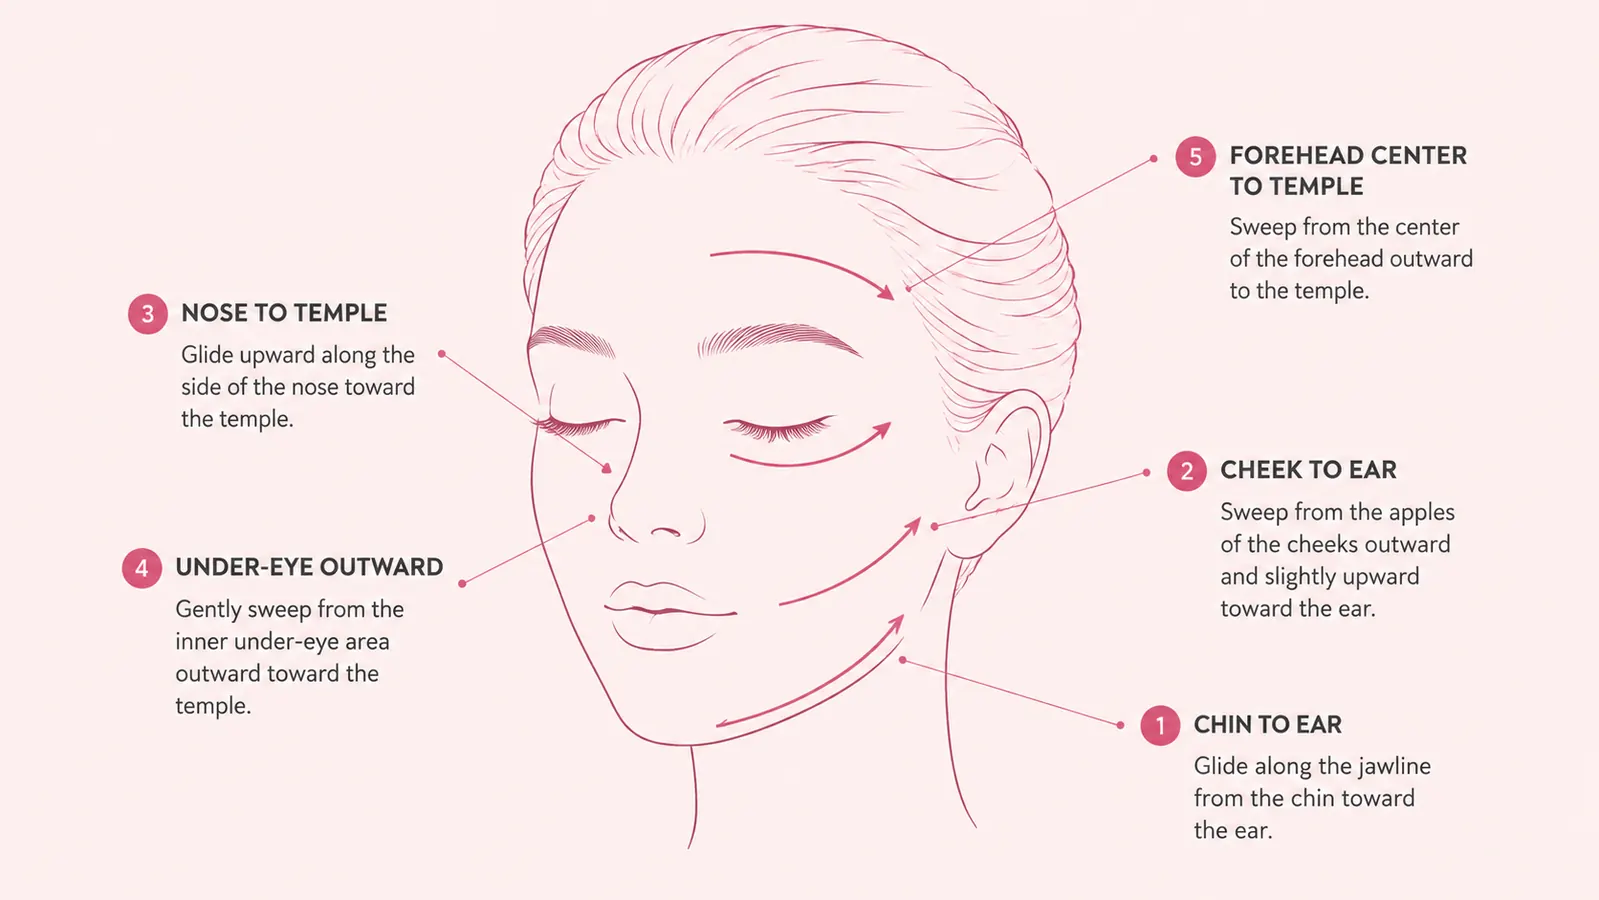
Step 3: Work the Jawline and Chin
Start your facial work at the lowest point and move upward. Place the notched edge of the gua sha stone at the center of your chin, nestled so one side of the notch sits below the jaw and one above. This groove on the ROSELYNBOUTIQUE tool is designed for exactly this. Apply medium pressure and stroke outward along the jawline toward your ear in one smooth motion. Repeat five times on each side.
Keep the stone nearly flat against the skin, no more than fifteen degrees off horizontal. The flatter the angle, the more surface contact you get, which means better fluid movement. If you hold it upright like a spatula, you lose most of the benefit. The angle is the technique detail that most beginners miss, and it is the one that changed my results most when I corrected it.
After each outward stroke toward the ear, do two short downward strokes on the neck to push that moved fluid down toward the collarbone. Jawline strokes, then neck release. That pairing is what drives drainage rather than just redistribution.
Step 4: Sweep the Cheeks and Cheekbones
Move up to the cheeks. Place the flat curved side of the stone at the side of your nose, just below the cheekbone. Stroke outward and slightly upward toward your ear, following the natural line of the cheekbone. Five strokes each side. This is the lift stroke that people post about on social media. Done correctly, with enough oil and the right angle, you will feel the tissue actually moving under the stone. That feeling is the tool working.
Below the cheekbone, use slightly more pressure than you used on the jawline. The tissue is thicker here and can handle it. Above the cheekbone, ease up. The skin over the cheekbone itself and toward the temple is thinner and closer to delicate capillaries. If you press hard near the temple and see flushing or small red marks, you went too firm. The skin on mature faces is not the same as younger skin. Calibrate your pressure accordingly.
Step 5: Finish at the Forehead and Under-Eye
The forehead is straightforward. Start at the center, between your brows, and sweep outward toward the temple in a smooth horizontal stroke. Five strokes each direction. For horizontal forehead lines, you can also use the tool vertically, sweeping upward from the brow toward the hairline in the center of the forehead. Use lighter pressure here than you did on the cheeks.
The under-eye area is where I am most careful. The skin here is the thinnest on the face. I use only the small curved tip of the gua sha tool, not the flat body, and I use almost no pressure at all. Start at the inner corner of the eye, right at the bridge of the nose, and sweep outward very slowly toward the temple. Three strokes is enough. More is not better under the eyes. If you have the jade roller from the ROSELYNBOUTIQUE set, this is actually where I prefer to use it instead of the stone. The roller applies even, consistent gentle pressure that is easier to control on such thin skin.
Finish the full session by doing the neck drainage strokes one more time. Chin to ear, then ear down to collarbone. This closes the loop and makes sure everything you moved during the facial strokes has a clear path out.
What Else Helps
Cold helps. I keep my gua sha stone in a small zip bag in the refrigerator overnight. A cold stone on a puffy face in the morning is noticeably more effective at reducing swelling than a room-temperature stone. The cold causes blood vessels to constrict briefly, which reduces the initial puffiness before the drainage strokes clear the fluid. This is not required, but if morning puffiness is your main concern, it is worth the habit.
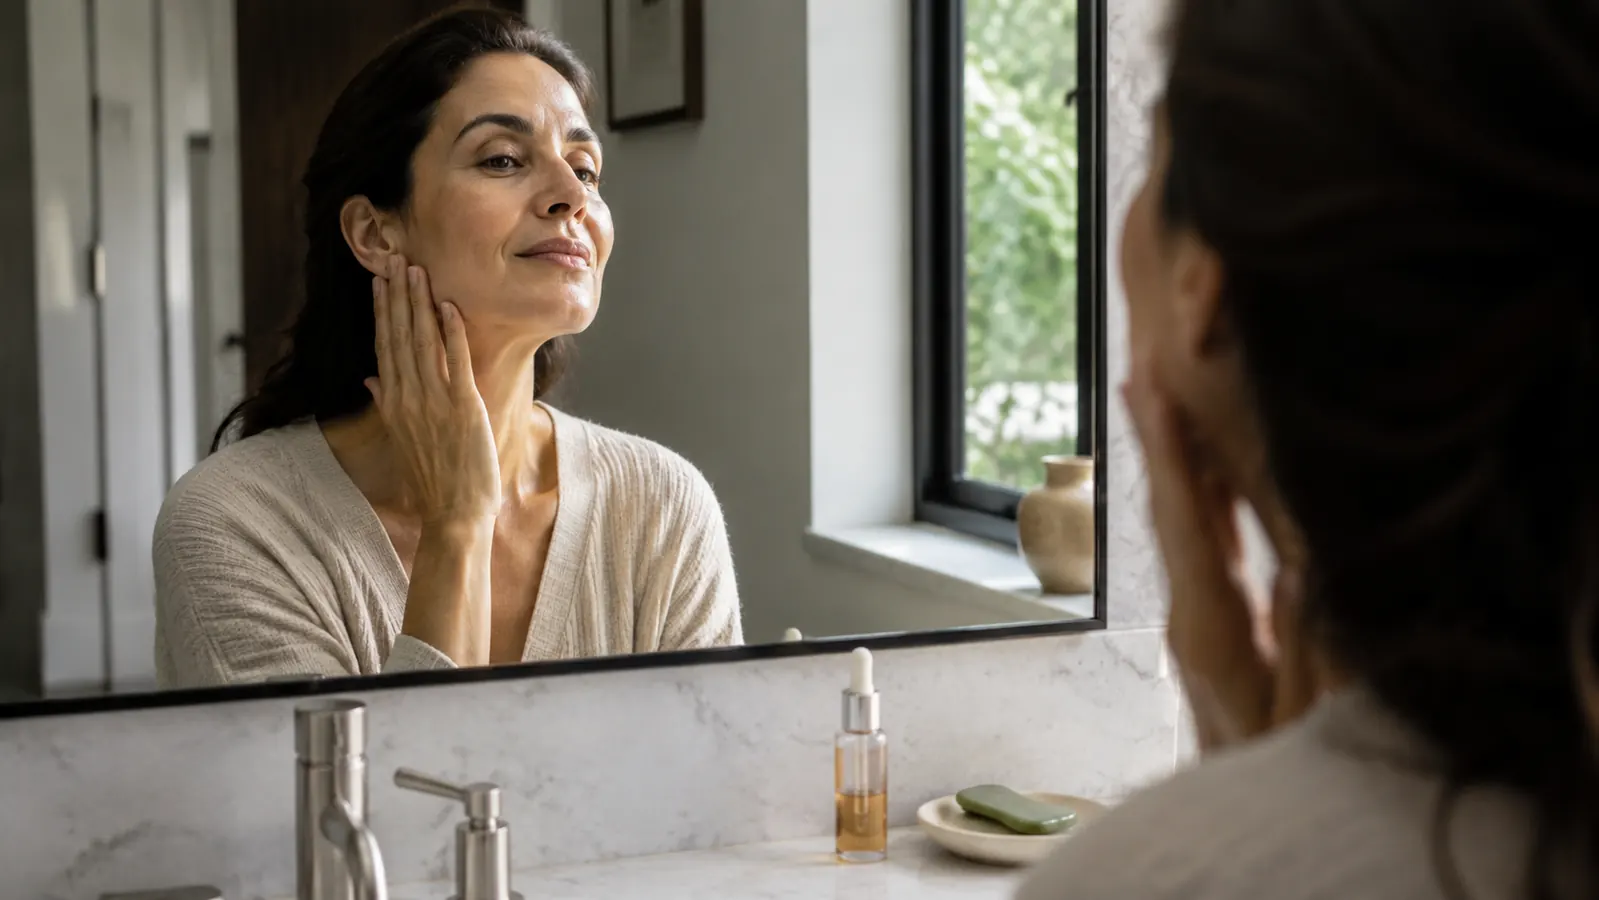
Consistency matters more than duration. A five-minute session every morning will do more for your face over a month than a twenty-minute session twice a week. The lymphatic system responds to regular stimulation, not occasional intense effort. I do mine immediately after cleansing, before any serum, as part of a routine I cannot skip because it sits between two other steps I always do. Find a slot in your existing routine that makes it automatic.
Hydration affects your results. I am not going to lecture you about water intake, but I will say that on days when I have had more coffee than water, my morning puffiness is worse and the gua sha session takes longer to show visible change. Keeping the body hydrated keeps fluid moving through the lymphatic system more easily. The tool works with your body, not instead of it.
What does not help: using the tool without oil, pressing hard in the hope that more pressure means more results, and doing more than three passes on the under-eye area. I have seen women in online groups talk about bruising from gua sha. That is almost always from using too much pressure on unoiled skin. With proper prep and a light hand, the ROSELYNBOUTIQUE set is safe and gentle for daily use on mature skin.
Ready to try the technique? The tool itself is under $7, and it comes with the jade roller for the under-eye work too.
The ROSELYNBOUTIQUE Gua Sha and Jade Roller set is one of the most reviewed facial tool kits on Amazon. Both tools you need to follow this guide are in the same box.
Amazon Check Today's Price on Amazon →