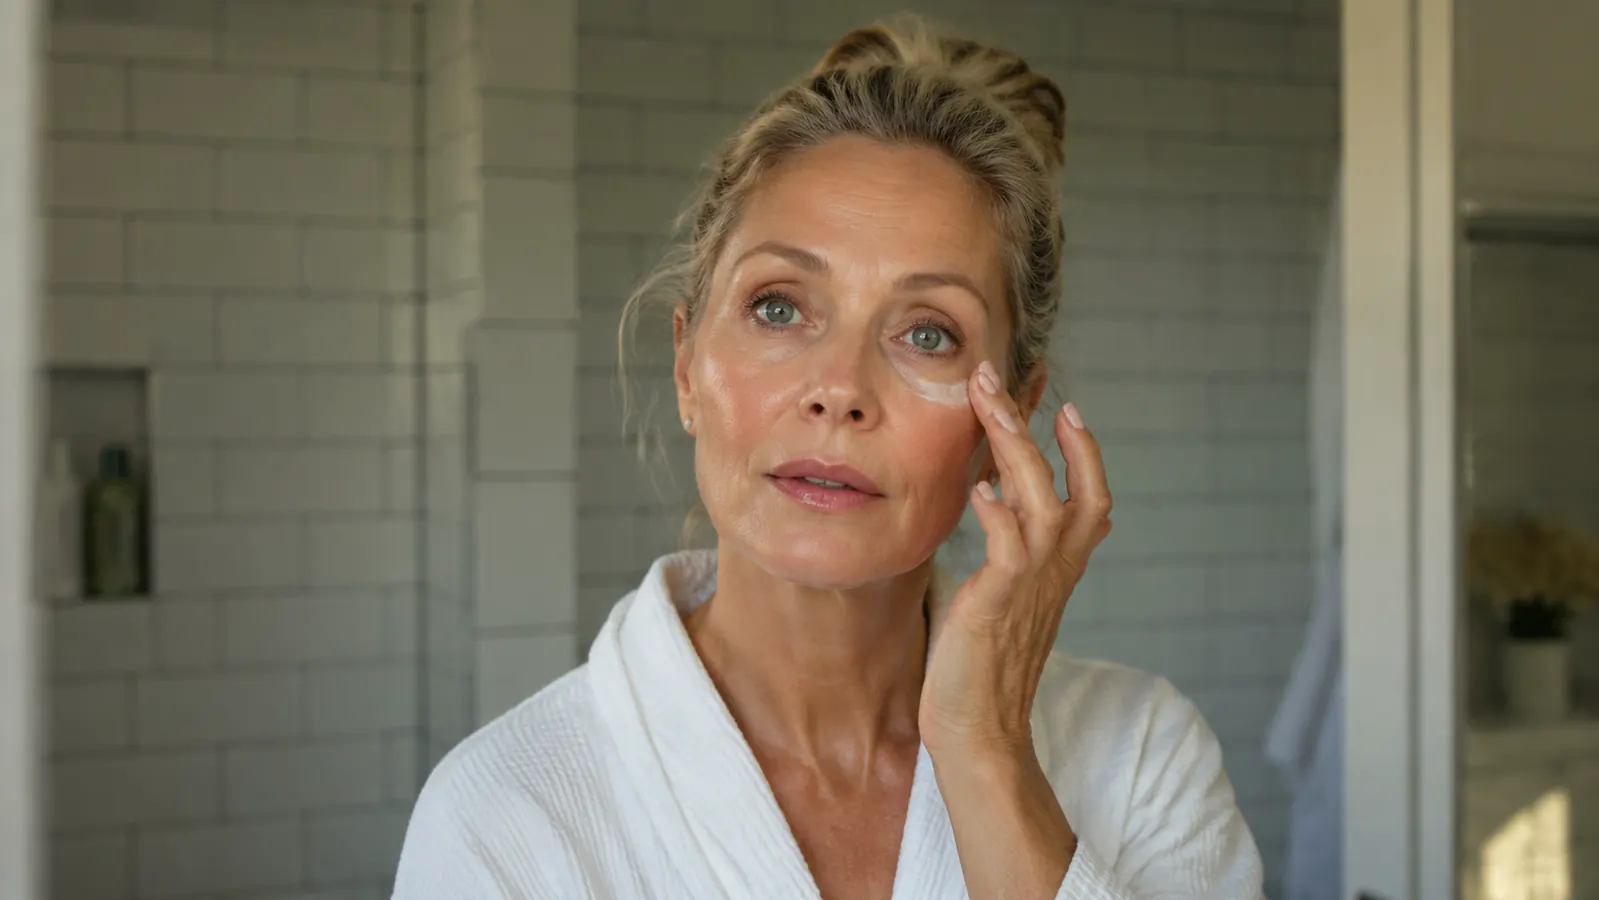
The skin under your eyes is some of the thinnest on your entire body. It has almost no oil glands, it moves constantly every time you blink or squint, and it takes the full force of UV damage and expression lines before any other part of your face shows it. By the time crow's feet and dark circles become visible in your fifties, the collagen breakdown underneath has been happening for years. A regular moisturizer, no matter how expensive, cannot reverse that process. What can help is retinol. But there is a right way and a wrong way to use retinol around the eyes, and getting it wrong is exactly why so many women give up before they see results.
I have tested RoC Retinol Correxion Under Eye Cream on my own skin for the better part of three months, and I want to walk you through the method that worked without irritating the delicate tissue around my eyes. This is not a guesswork protocol. It is the exact sequence, timing, and amount that let retinol do its job while keeping the area comfortable enough to stay consistent.
If your under-eye area looks older than the rest of your face, this is the retinol formula built for that exact problem.
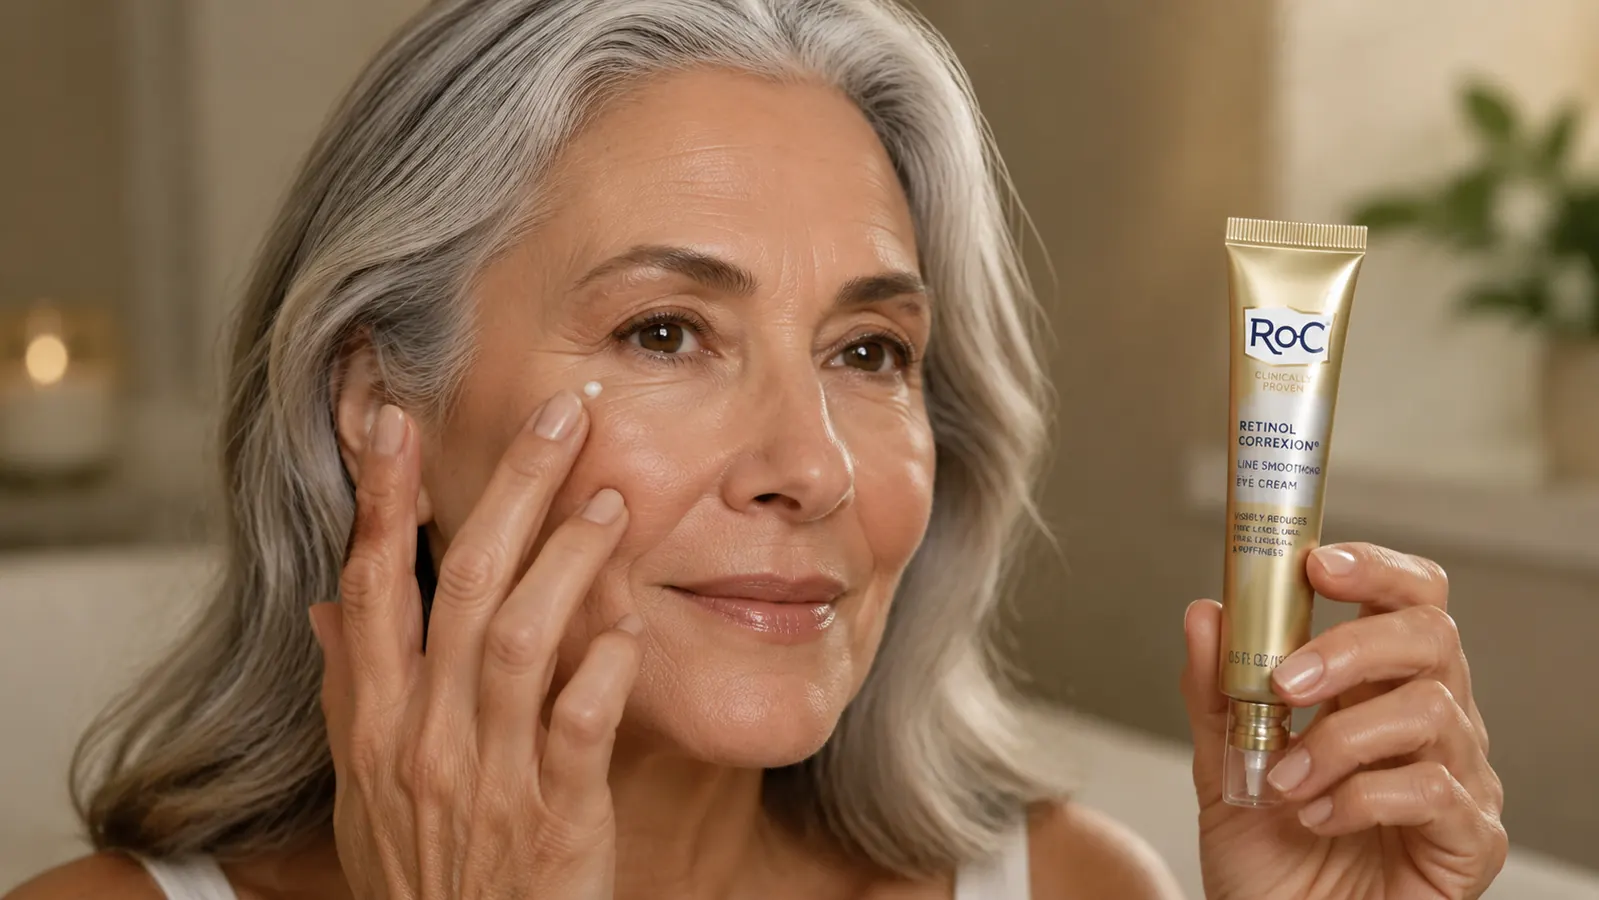
RoC Retinol Correxion Under Eye Cream has over 33,000 Amazon reviews for a reason. It targets crow's feet, dark circles, and puffiness with a retinol concentration calibrated for the thin skin around the eye, without the burn you get from a full-face serum applied to the wrong area.
Amazon Check Today's Price on Amazon →What Retinol Actually Does Under the Eye (And Why It Takes Time)
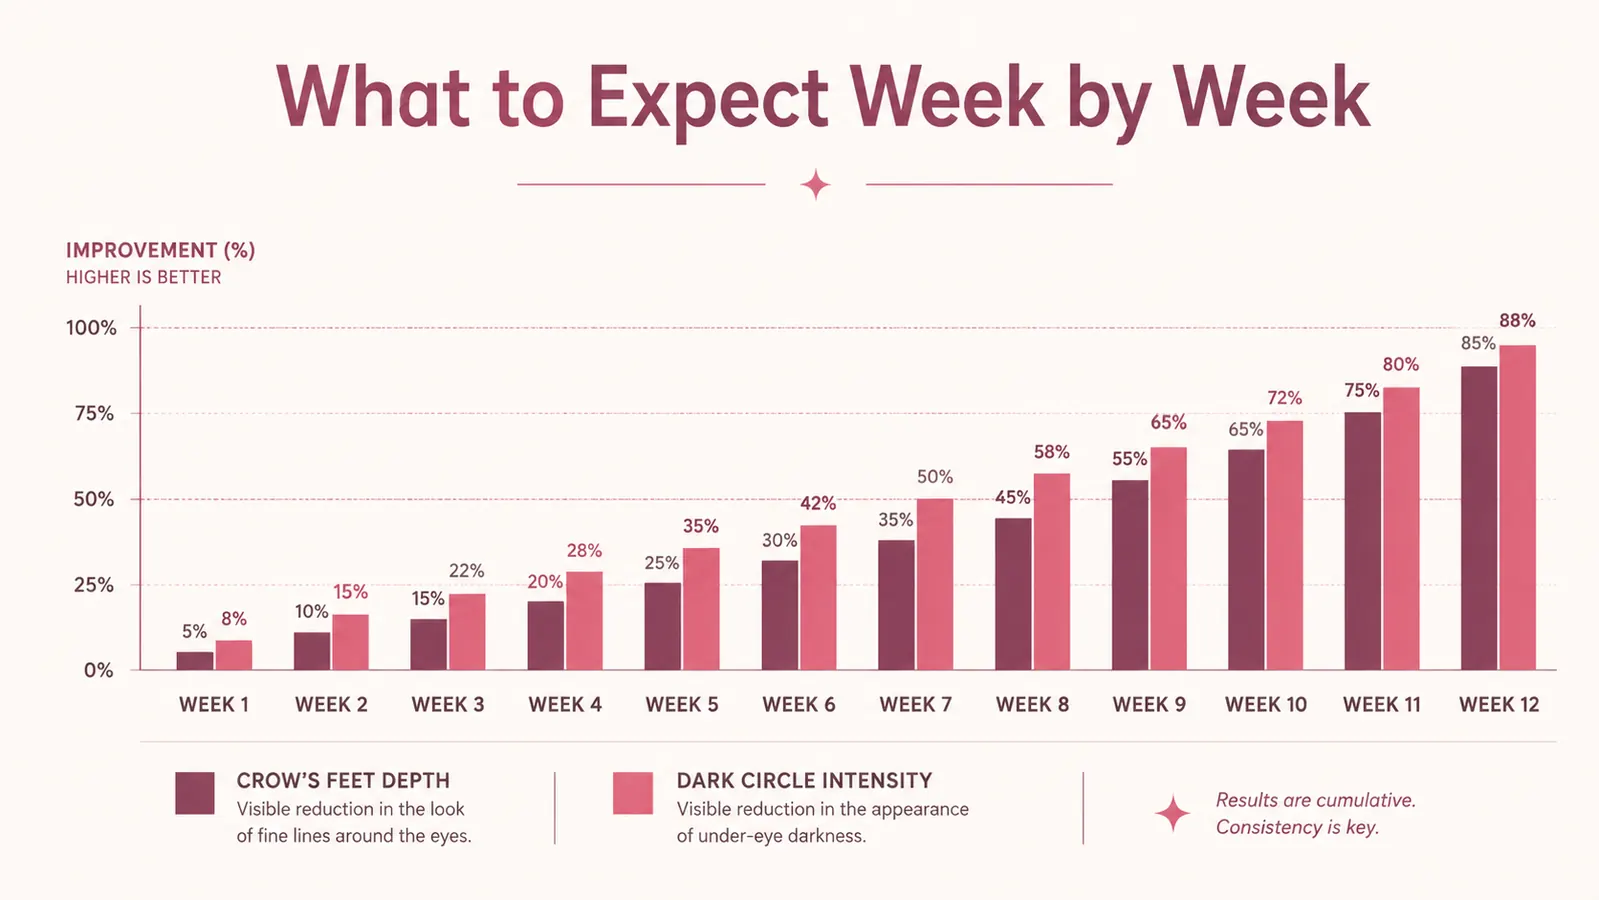
Retinol is a vitamin A derivative that signals skin cells to turn over faster and encourages fibroblasts to produce more collagen. Around the eye, where the skin is thinner and collagen depletion is more advanced, this cell-signaling process takes longer to show up visibly. Most dermatologists put the honest timeline at eight to twelve weeks before you see a meaningful reduction in fine lines. Dark circles improve more slowly because they often involve a combination of thinning skin, dilated blood vessels, and pigmentation, not just surface texture.
The reason retinol-specific eye creams exist, rather than telling you to just dab a little face serum under your eyes, is concentration and formulation. A retinol serum built for the cheeks and forehead can be strong enough to cause stinging, peeling, and inflammation when it migrates into the eye area. RoC Retinol Correxion Under Eye Cream uses a retinol concentration designed for this thinner, more reactive skin, combined with mineral actives that help the retinol penetrate without overwhelming the barrier. That difference matters when you are trying to stay consistent for twelve weeks.
Step 1: Start With a Clean, Dry Under-Eye Area
Apply your retinol eye cream only after cleansing and patting the under-eye area completely dry. Damp skin drives actives deeper and faster, which sounds appealing but increases irritation risk around the eye. Give your skin two full minutes after patting dry before you touch the eye cream. That is it. No toner, no essence, nothing layered underneath at this stage. Clean and dry is the safest starting point.
If you wear contact lenses, remove them before applying anything around the eye area. Retinol cream that migrates onto a contact lens is uncomfortable at best and damaging to the lens at worst. Put your contacts in after your skincare routine is fully absorbed, which takes about ten minutes.
One thing I learned the hard way: do not apply retinol eye cream right after removing waterproof mascara with an oil-based remover. Any residual oil on the skin creates a barrier that prevents the retinol from absorbing properly, and the combination of an oil cleanser followed immediately by a retinol active can cause a low-grade surface reaction that looks like redness and feels like mild sunburn. Cleanse with a gentle foaming or gel wash if you plan to use your eye cream that night.
Step 2: Use the Right Amount (Most People Use Too Much)
The correct amount of retinol eye cream is roughly the size of a grain of rice per eye. That is a small dot, smaller than you probably expect. Under-eye skin has a limited capacity to absorb product, and using more does not accelerate results. What it does is increase the chance of product migrating onto the eyelid or into the eye itself, which causes stinging and defeats the purpose of staying consistent.
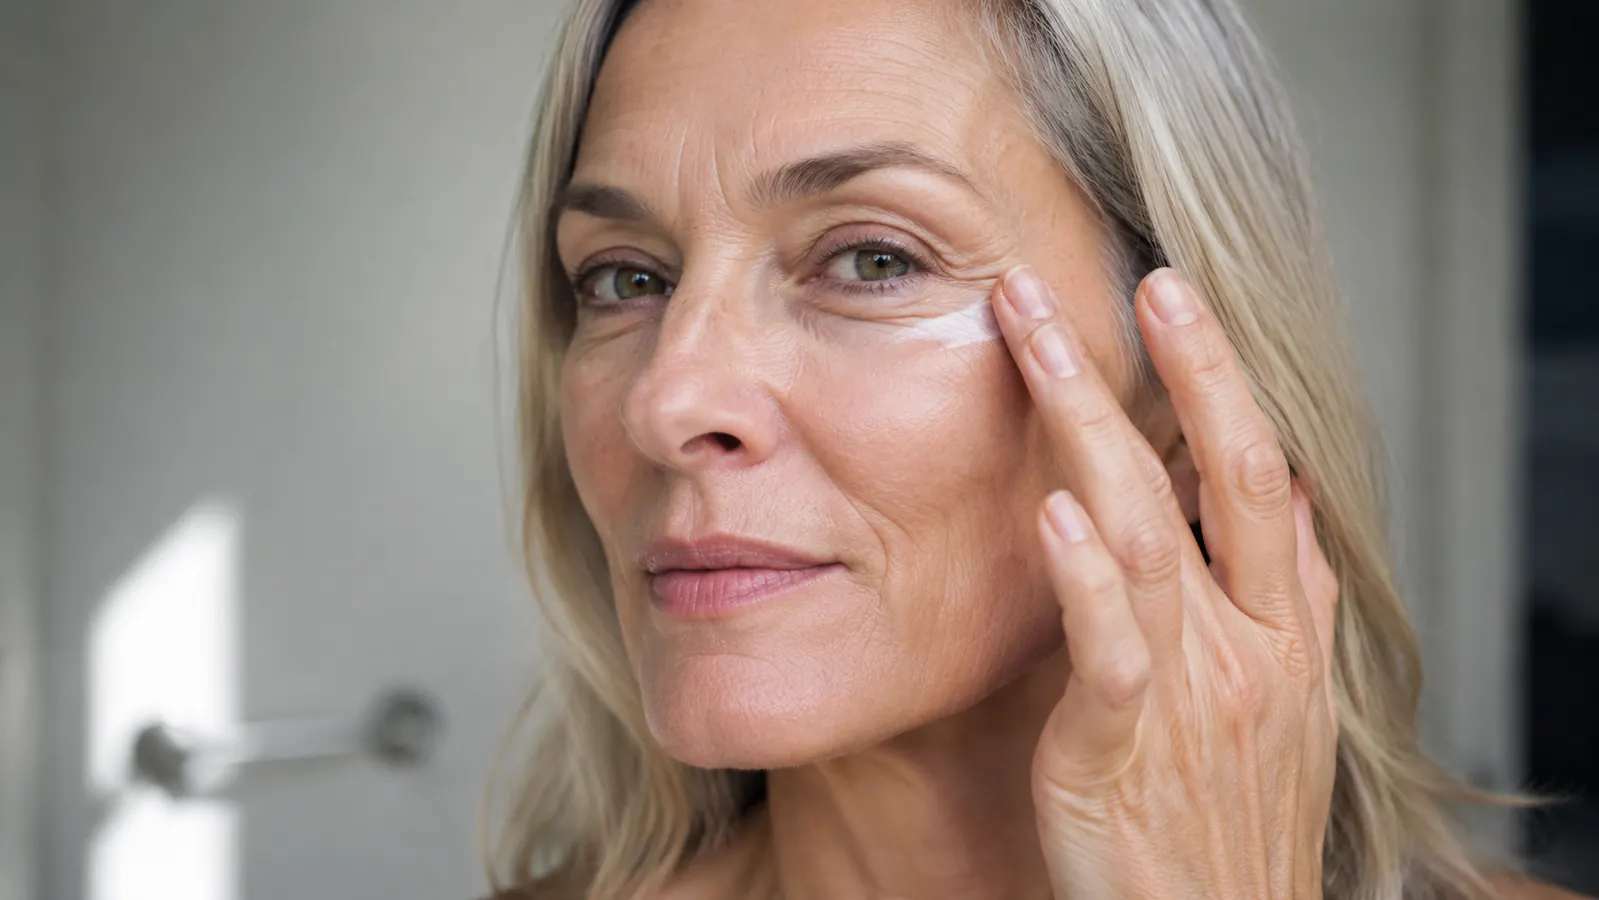
Dispense onto your ring finger, not your index finger. Your ring finger applies less pressure than any other finger, which matters around the eye socket where the bone sits close to the surface. Press the cream lightly onto the orbital bone area, starting at the outer corner where crow's feet concentrate, then moving inward below the eye. Do not rub. Pat gently three or four times and let the warmth of your finger help the cream absorb.
A grain of rice per eye, patted on with your ring finger, is the exact technique that lets retinol work without irritating tissue that is already doing a lot.
Step 3: Apply at Night Only, at Least Until Week Six
Retinol breaks down in UV light. Using it during the day is not just ineffective, it can make the skin around your eyes more photosensitive at a time when sun exposure is highest. Apply your retinol eye cream at night, after your evening cleanse, and reserve the morning routine for hydration and SPF.
For the first four weeks, use it every other night. This is the part most instructions skip, but it is the reason so many women quit early. The under-eye area can feel tight, slightly flaky, or mildly sensitive when you first introduce retinol. Every other night gives the skin enough recovery time between applications while still building tolerance. From week five onward, you can shift to nightly if your skin is comfortable. If you are still noticing irritation at week four, stay on every other night through week eight. There is no prize for rushing this.
I will be honest: I had one week around day twenty where the outer corner of my right eye felt dry and slightly tight after application. I backed off to every other night for ten days and it settled completely. That kind of adjustment is normal and does not mean the product is wrong for you.
Step 4: Layer a Plain Eye Moisturizer on Top (Optional but Helpful)
After your retinol eye cream has had five minutes to absorb, you can apply a plain fragrance-free eye moisturizer or a small amount of your regular night cream around the orbital bone area. This is called buffering, and it does two things: it helps seal in the retinol so it keeps working through the night, and it provides a cushion of hydration that reduces the likelihood of dryness or flaking as your skin adjusts.
Use something simple here. A plain ceramide moisturizer or a peptide eye cream with no active ingredients (no vitamin C, no additional retinol, no AHAs) works well. You are not stacking actives. You are just giving the skin a hydration buffer on top of the retinol treatment.
If you find the under-eye area is consistently dry or flaky after three weeks of the above protocol, try applying a thin layer of plain moisturizer first, letting it absorb for two minutes, then applying the retinol eye cream on top. This dampens penetration slightly, which reduces efficacy marginally but makes it far easier to stay consistent, which matters more in the long run.
Step 5: Protect the Area Every Single Morning With SPF
This step is not optional. Retinol increases photosensitivity. If you apply retinol at night and then spend the next morning without sun protection, you are undoing the collagen-building work the retinol started and increasing the risk of hyperpigmentation around the eye. Broad-spectrum SPF 30 or higher, applied to the orbital bone area every morning, is non-negotiable when you are on any retinol routine.
The practical challenge is that most people do not apply sunscreen close enough to the eye area because they worry about stinging. Choose a mineral sunscreen or a formula specifically rated for the eye area. Pat it gently onto the orbital bone, not the eyelid itself, as part of your morning routine. If your daily SPF burns when it gets near the eye, switch formulas before you abandon the sunscreen step entirely.
What Else Helps
Retinol does the heavy lifting, but a few supporting habits speed things up noticeably. Sleeping on your back, or at minimum on a silk or satin pillowcase, reduces the mechanical compression lines that deepen crow's feet and under-eye creasing overnight. I know this sounds small. After six weeks of sleeping on a silk pillowcase, I noticed the lines at the outer corner of my eye were measurably less defined in the morning, before any cream could have taken effect. That is compression working against you when you sleep on cotton.
Staying consistently hydrated helps the thin under-eye skin look less hollow and less shadowed. Dark circles that have a blue-gray tone are often partly vascular, meaning the blood vessels beneath the thinning skin show through. Retinol can thicken the skin over time and reduce how visible those vessels appear, but adequate hydration keeps the skin from looking translucent in the meantime. Eight glasses of water a day is not a skincare myth when it comes to the eye area.
Cold compresses, or just two cold spoons held against the under-eye area for a minute in the morning, reduce puffiness that makes fine lines appear deeper. This is a short-term fix, not a long-term treatment, but pairing it with your morning SPF routine takes thirty seconds and makes a visible difference before you leave the house. The under-eye area is one of the few places on your face where a simple mechanical intervention makes an immediate cosmetic difference.
One thing that actively works against any eye cream: rubbing your eyes. The pulling and tugging from habitual eye-rubbing accelerates the loss of elasticity around the orbital area faster than almost any other behavior you can control. If allergies are the driver, treat the allergies. If it is a dry-eye habit, use artificial tears. Retinol can rebuild some of what is lost, but it cannot keep pace with ongoing mechanical damage.
What to Realistically Expect
After twelve weeks of consistent use following the protocol above, I saw a noticeable softening of the fine lines at the outer corners of my eyes. The crow's feet that were visible even with a relaxed expression faded to the point where I had to actively squint for them to appear at the same depth. My dark circles, which run more on the purple-brown pigmented side than the vascular blue-gray type, improved moderately but not dramatically. That is consistent with what the research shows: retinol works better on structural fine lines than on pigmented discoloration.
Puffiness, for me, did not change from the retinol alone. What helped puffiness was the combination of sleeping position and those morning cold compresses. The retinol's job was the wrinkles and the slow structural rebuilding. Expecting one product to solve every under-eye problem at once is the fastest path to disappointment.
With over 33,000 reviews, RoC Retinol Correxion Under Eye Cream has the real-world testing record that most eye creams do not. The consistent pattern in the reviews mirrors what I experienced: people who used it consistently for at least eight to twelve weeks reported visible improvement. People who gave up at three weeks because they did not see immediate results did not. That timeline is the honest truth with retinol, and it applies to every retinol product in every concentration.
Crow's feet that have been building for years need twelve weeks of consistent treatment, not a one-week experiment.
RoC Retinol Correxion Under Eye Cream is formulated specifically for the thin, reactive skin around the eye. At its current price on Amazon, it is one of the most affordable retinol eye treatments with a real clinical track record behind it. If you follow the step-by-step protocol above, you are giving it the best possible chance to work.
Amazon Check Today's Price on Amazon →